I am a college student. I am graduating at the end of the month and then I am going on to grad school (more on that in a future post.) Renting and having moved into a different place every year leaves very little desire to try and buy/make pieces customized to the space where I am at nor do I want to invest in any high dollar items. Today I want to share some of my favorite tips for decorating on a budget.

Check Craigslist out
I got this IKEA Alvine Ruta rug for $75 on Craigslist and it has held up wonderfully. I need to wash it but that won't be any time soon. My used price is much better than the brand new price of $249. I like the pattern and the fact that the rug is 100% wool.

Check your apartment building's trash area
Whenever a neighbor moves in or out of their unit, there is a good chance they will be tossing something. Carter snatched up a fan which he was excited about and I got this rug. Completely FREE!


Garage Sales
I made these underbed storage drawers using garage sale drawers. I paid 40 cents per drawer.
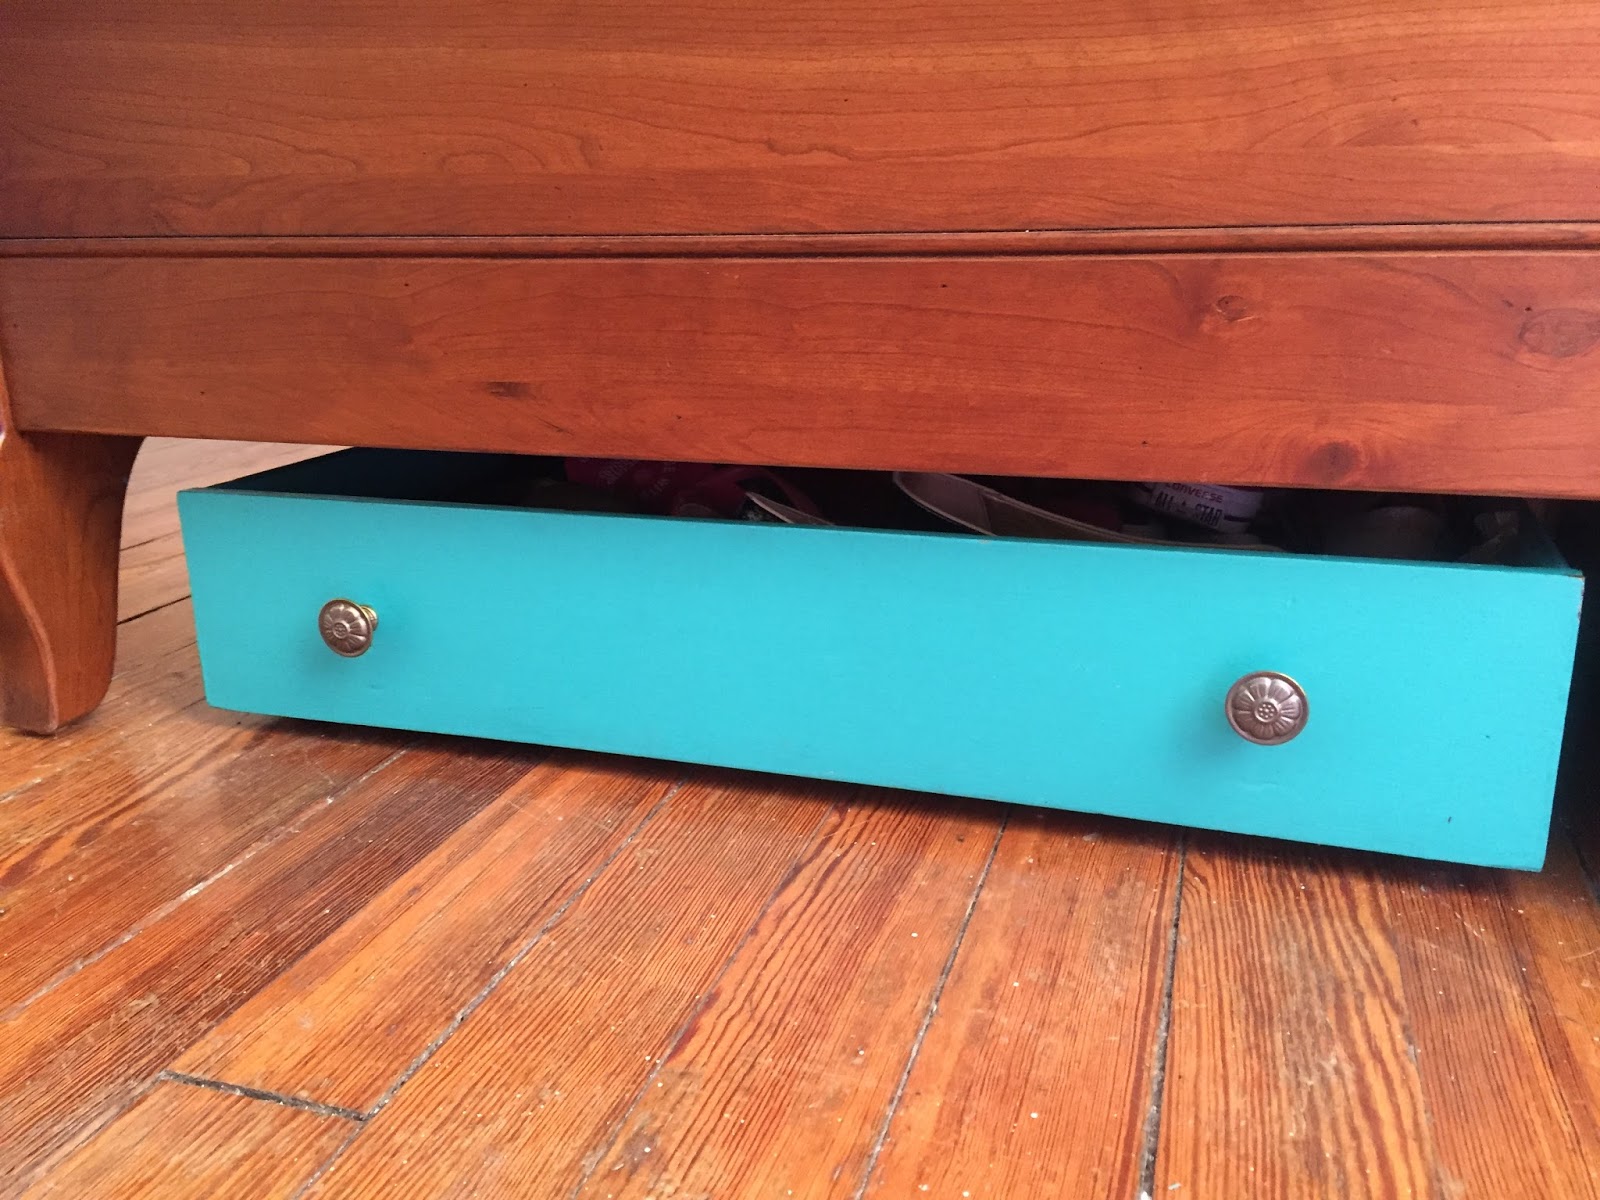
DIY underbed storage
I also bought my printer with scanner and copier at a garage sale for $10.00. The couple was mailed a new one from HP after this one "stopped working" after they returned from their winter home in Florida but I have had zero problems.


Check out your local thrift shops
I have found some pretty awesome little knick knacks. I love my two metal tins. The smaller holds matches, gum, and laundry coins while the larger holds headbands and hair accessories. I have also bought a lot of other great things secondhand. 


See what your family is not longer using and planning on tossing
I have gotten a lot of things this way. A dining table from my grandparents, a few carts, and my favorite: my beloved ceramic owls. All free!


See what you can borrow from family
Chances are if someone will let you borrow something because it also means they don't need to deal with storing it. I have been able to use Carter's mom's childhood desk from her parent's home. It's an adorable midcentury piece that is the perfect size for my space. It has two awesome little drawer spaces - one where I can hold my books and another for my pens. Again this is free!


Ask for things you need for your birthday/Christmas
My dresser was a gift that was actually purchased on Craigslist but I love the antique style.


See what you can DIY
Maybe some thumbacks or magnets?


I am going to share another project that I made a few years ago. I made these thumbtacks long before I started this blog but I still use them and enjoy their bright little pop of patterns and color. Made with those little glass gems that some people use to fill vases and recycled bits of magazine paper, this project is quick and low cost. I only had to buy the glass gems which cost me a dollar. 


These are great in my apartment to hold random stuff like coupons, mass schedules, receipts that I need reimbursed on, and other important things I don't want to lose. My bedroom in my apartment came equipped with a 4x4 foot bulletin board so I have plenty of space to use these. You can check this project out on my Kollabora too!

Materials:
Glass vase gems (Found at Dollar Tree or a store's floral section)
Magazines
Modge Podge
Paint Brush 
Scissors
Flat Thumbtacks
Apoxy glue

Stored in a thrifted jar. 
How to:
1. Go through your magazines and rip out pages with tiny patterns that you like.
2. Cut out tiny circles about the size of a dime from the pattern.
3. Using the Modge Podge, glue the circles with the pattern side facing the flat side of the glass gems. Let dry.
4. Glue the thumbtacks* to wrong side of the paper circles using the apoxy glue. Let dry completely. 


I let my jar sit on my printed next to a massager and my current book reading pile.

*I have also done this successfully with magnets!

I struggle to post here regularly. Not because I am not making and creating but because I am terrible at taking pictures. It seems like the majority of time I have that I can work on this blog is during the evening when lighting is poor. Due to bad lighting, I finally got pictures of my drawers over the weekend. Disclaimer: I made these and have been using them since the summer of 2014. I am just now sharing them with you a year and a half later. But hey, at least I can say the drawers have been tested and tried. And I love them! You can check this project out on my Kollabora page too!


So here's how these drawers came to be: as I was preparing for moving into my new apartment led me creating a list of things that I would need to buy for the space as well as things I wanted to create. Since my apartment was small and the amount of storage was sparse, I knew that I wanted to have underbed storage. I wanted to make drawers instead of buying the collapsable bags because 1) drawers are prettier, 2) they would hold up better, and 3) they are customizable. 

 I was inspired by this pin:
Source

I loved the idea of an oil cloth lining for ease of cleaning and the extra pattern. I also loved the bright colors.


I cam across these drawers at a garage sale a few summers ago and I decided to buy them for a total of $2. I knew that even if it took me months to do this project I wouldn't be out much because a paid a whopping 40 cents per drawer. They are dirty but that wasn't anything a little soap and water couldn't fix. Surprisingly, I had these washed and painted right away.
Cameo appearance by Bo!
Nice and grimy...probably not worth more than 40 cents.
 What you'll need:
Drawers-thirfted or homemade--look for solid wood!
Oil cloth fabric
Paint
Wallpaper adhesive
Dresser knobs/spray paint
Caster wheels

Miscellaneous Supplies:
Screws and Screwdriver 
Paint Brush
Wallpaper Brush/squeegee
Sandpaper

Start by vacuuming out any dust from the inside of the drawers. Then remove your handles. If they are dirty like mine were, wash them out with warm water and soap using a rag and scrub brush. I did this on a warm summer day so they dried quickly in the sunshine. I washed each drawer twice.

Next lightly sand each drawer using a medium grit sandpaper. According to my mom, by lightly sanding the drawer, you will remove some of the stain/varnish which will allow your paint to adhere better and ultimately look nicer when finished. 

 Paint your drawers. This will take a few coats of paint.

I wasn't worried about the bottom since I knew I was adding a liner to the bottom.
So much better already!

I got my green paint from our local Habitat for Humanity store. I paid $5 for a gallon of paint that was at least 80% full. For quick little project like this, I would highly recommend looking into getting your paint from a resale store such as Habitat for Humanity. It's recycled paint from a previous owner-win. You are supporting a good cause-win. You are getting paint for wayyy cheap-win. 
Win-win-win. Also a win: the teal paint was FREE from where I worked over the summer. :)

So pretty.

Harbor Freight FTW
After your drawers are painted and dry, it is time to attach your wheels. I got mine for 80 cents a wheel at Harbor Freight. I really like them and they work great! I have been using the drawers like crazy and have had no issues!

Then add your hardware. I ended up buying some new knobs at Menards the day before I left for school. Since I was on a time crunch and there weren't any I saw that I liked for a low enough price or any that were the right color for the right price, I ended up getting some I liked in wrong colors and a can of spray paint. After a quick spray, my knobs look great! It was an easy fix. In time I might splurge for some clearance Anthropologie knobs but I was on a time crunch when I was working on these! Update: still using the original knobs. 


The last step is to add your oil cloth fabric lining. I debated what would be the best way to do this. I was going to get a spray adhesive but my mom suggested using wallpaper glue. We had some in the garage because my mom has done countless home improvement projects for others.


How to adhere the oil cloth using wallpaper adhesive:
Using a paint brush, coat the bottom of your drawer with wallpaper glue.
Lay the fabric over the glue.
Using a wallpaper brush/squeegee flatten the fabric so that all excess glue comes out and no air bubbles remain.
With a damp rag, wipe away any of the excess glue.
Cut the oil cloth with a utility knife.
Sadly I had no pictures of this part! :(

Fill your drawers!
How I am using my drawers:
Yarn storage
Food storage
Shoe storage
School supply storage in my drawers at home

I took the three blue ones with me to school and left the green ones at home. I honestly couldn't be happier. I have a ton of extra oil cloth because I ordered way too much but I hope I can find some other projects to use it on. I have a bunch of extra paint/spray paint left too even though I used leftover paints. Overall, I spent more on these drawers than a couple under the bed storage bags but I love them. The cost for making these was still incredibly low though! They are sturdier, prettier, and overall a higher quality. I have already got so much use out of them!


I began thinking about this back in November. I was thinking of things I enjoy doing and ways to save money. I decided that thrifting was obviously my favorite way to save and shop! I thrift the vast majority of my clothing so this year I am going to try to take it a notch up. This will help me save even more money as a shop and I am also helping the environment by loving someone else's old items. I am going to try and go a whole year of just thrifting! If I need it, I'll thrift it. 

I already have two exceptions though:
1. Underwear. I already have way too much but if I get a free underwear coupon from Victoria's Secret, I will use it.
2. Running shoes, you need to replace your shoes as they break down to avoid injury so I won't be thrifting someone else's.

Places I will be thrifting during 2014:
Salvation Army
Goodwill
St. Vincent de Paul Society
Local Shops
Garage Sales
Antique shops
Consignment stores
Auctions
If I need something else, I will try eBay and Craigslist.


To make things a bit more interesting, I gave myself an extensive list of things to try to find throughout the year. I will plan to check back in at the end of every month to show off what treasures I found second hand and how much I spent on each item. 

Here is a copy of my list.
You can save or print this to take thrifting with you.
Here is a copy of a blank template if you want to make your own thrifting list.

By the way, I found the template I used here.

Good luck, go out there, save money, and have fun!

Happy 2014!


I found some nautical coasters that were pretty expensive. You can find them all over Etsy but by looking at them, you can tell they would be a fairly easy DIY project. 

I had some cotton rope that I had gotten awhile ago planning to use it for a sew rope basket (that failed.)  So I was glad to do this to use it up. I think I purchased the rope for $1 at our local Habitat for Humanity store. If you've never checked them out before you totally should for your next home project! 

I made these for a Christmas gift for Carter's parents to use at their new cottage. I put them on these homemade spools that had all these crochet coasters that I had got at Salvation army. I got about 40 coasters and ten spools for around 50 cents total.

That makes this a 1.50 project for 15 coasters (I used the whole thing of rope.) That means it was about 10 cents a coaster!

What you'll need:
Rope (I used cotton)
Glue gun
Nail/hammer
Piece of scrap wood
Tape
Thumbtacks

PREP WORK

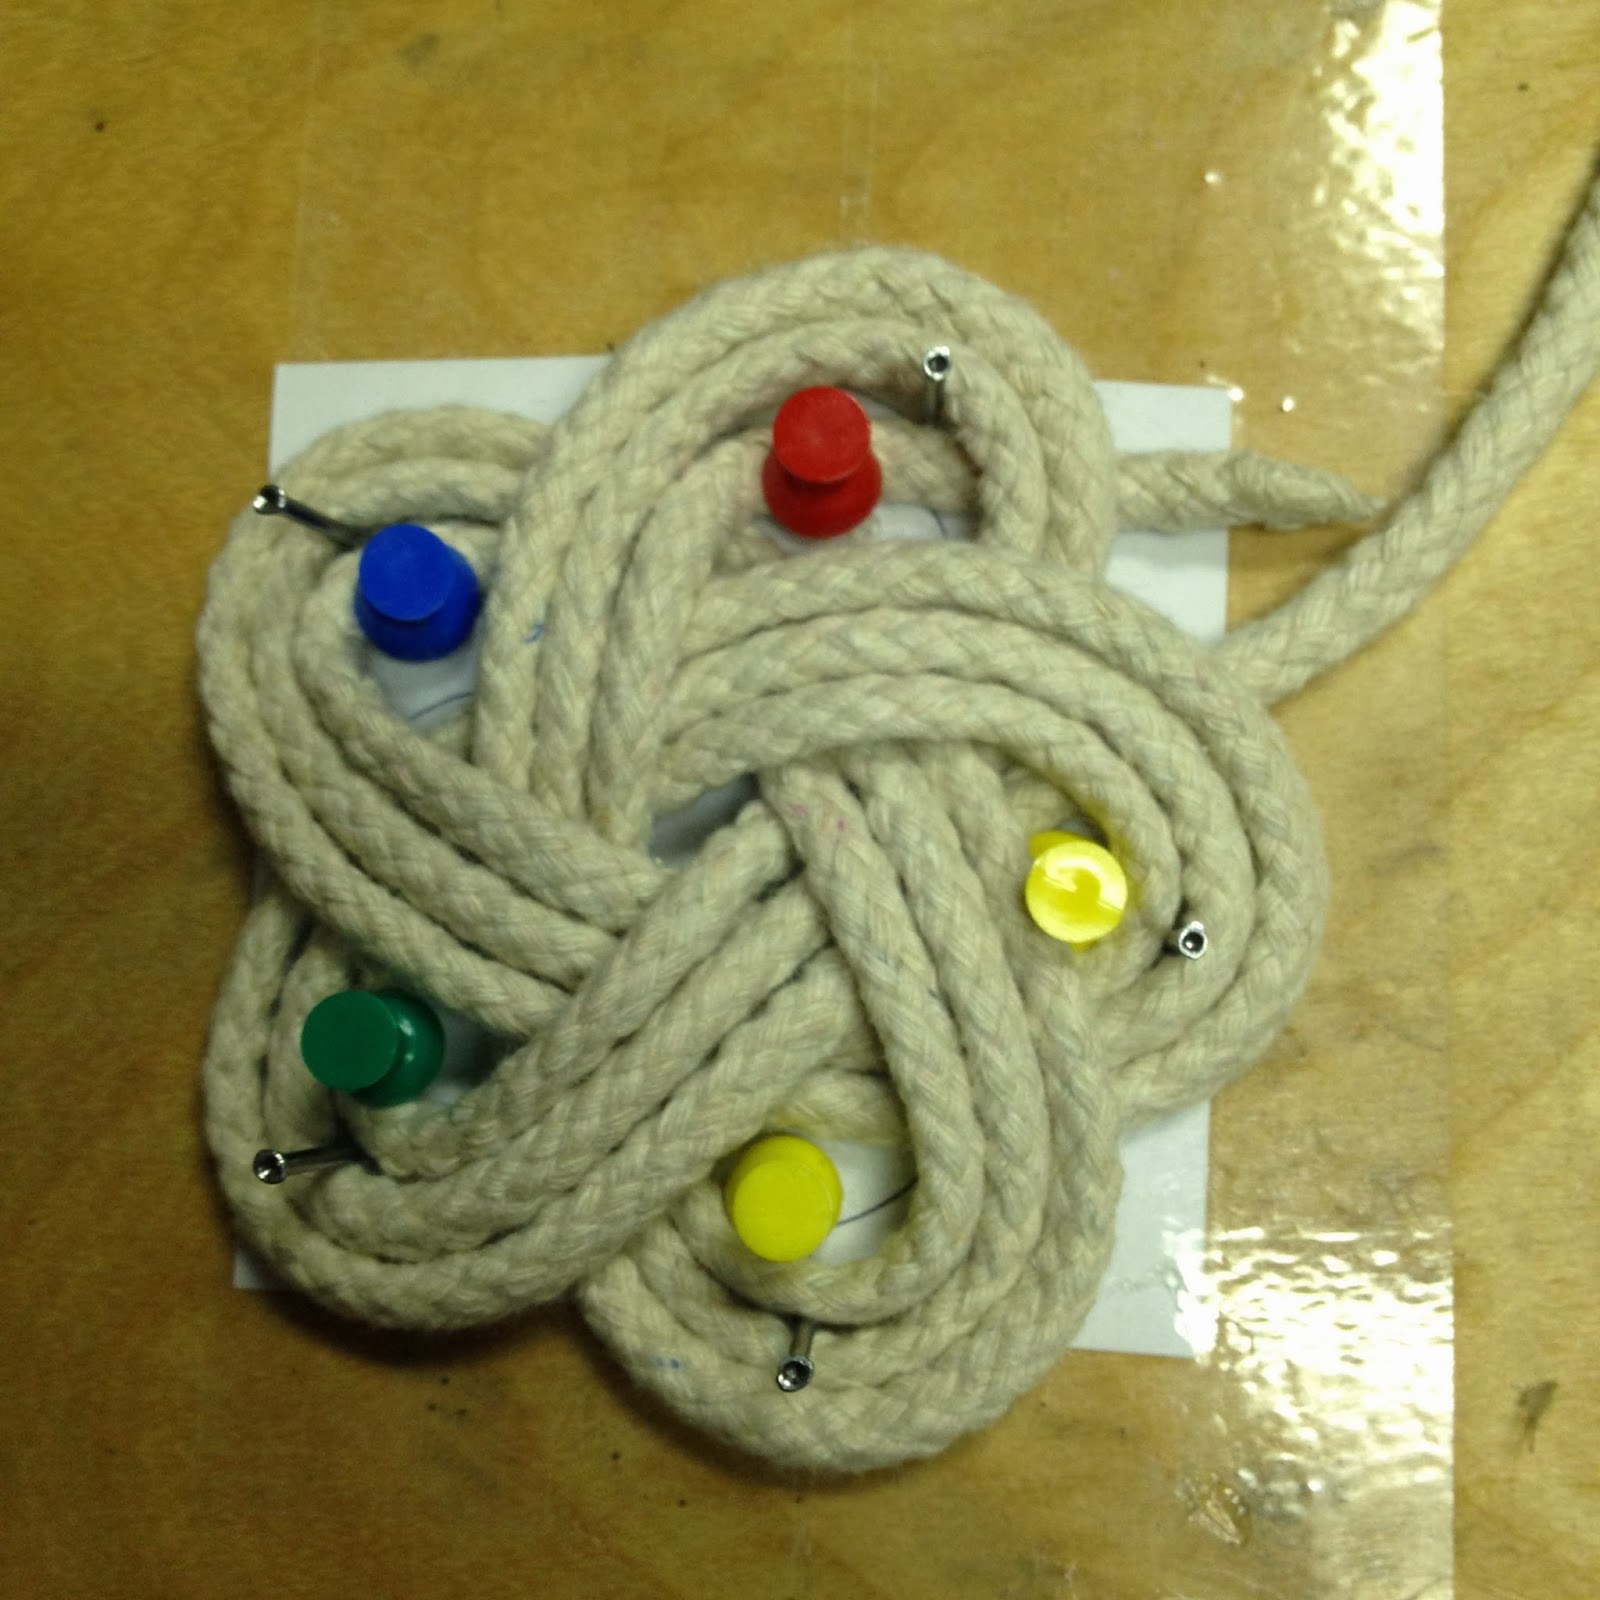
1. Print off this diagram of a Larks Head Knot in the size you want your coaster to be.
Print me off :)

2. Cut it out and tape it to the scrap piece of wood. I just free handed mine because my printer was being stubborn.

3. Hammer a nail at the outside of each loop.
Try to place the nail near the center of the loop.
4. Place a thumbtack (or another nail) into the inside of each loop.


MAKING A COASTER

1. Cut a piece of rope roughly 4 feet long. The amount of rope you will use will depend on your rope thickness and how many rounds you do. I suggest you try making a coaster before cutting a piece of rope off, then cut this and use this piece as a guide for how long to cut your other coasters.

2. Place a small about of hot glue at each end to prevent fray. This will also make weaving the rope much easier.

3. Begin by placing the rope with a 2 inch tail between on of the nails and thumbtacks. Then follow your Turks Head diagram to see if your rope should go over or under the other loops it crosses. Create your first round making sure the rope goes between all the nails and their matching thumbtacks.

4. Repeat step 3, this time making your loops directly outside your nails. 

5. Repeat step 3 again, this time placing your rope directly next to the second loop.

6. As you can see your coaster/trivet looks a little sloppy and loose. Pull the rope starting at the beginning of the first round. Continue pulling until the trivet is tighter and all the extra rope that had been making the coaster loose is at the end. (I know that is confusing but hopefully it makes sense!)


7. So since the tail is under some other loops, with the hot glue gun, place some glue under the loops to secure the tail in place. Then cut off the excess rope. 

8. Remove the thumbtacks and glue the beginning excess rope in place so it looks like the trivet is a continuous piece. Then glue each loop in place to the loop under it. This way your piece will keep its nice flower shape and won't look wonky. 


I also found this tutorial on making Turks Head knot coasters. They make their a little differently but still gets the same look. Just gotta do whatever is easiest for you! :)


This is by far the largest and complex thing that I have sewn to this day. I was intimidated, and a few times along the way, I thought I was going to need to give up. Alas, I made it! Carter's parents were redoing their kitchen and dining room and his mom had pinned this picture and asked if it was something I could do. Be naive, I accepted the challenge. But hey, it wasn't too bad! And it looks fabulous with their farm table!

The Inspiration by Sophia's
What you will need: 
Fabric of choice (I used linen)
Matching thread
Scissors
Rotary Cutter/board
Sewing Machine
Lots of Pins
TIME

Step 1: Lay out all your fabric, I think this piece was about 4 yards!!! Cut the fabric out so that it is an inch longer and an inch wider than you want your finished piece to be.
 Step 2: Setting your machine to the closest zigzag stitch sew along all the edges to prevent fraying. If you have a serger, use that. I didn't and the close zigzag seems to work.

Step 3: Fold all the edges over half a inch and sew along using a 1/4 seam allowance. 
Just starting out
All sewn but you can't tell 
Nice and clean (sorta)
Step 4: Cut out your strips for ruffles. I cut out 8 rectangles-4 for each end of the runner. Cut these strips 1/2 an inch wider and 3 times the length then you want your finished ruffle to be.

Step 5: Setting your machine to the closest zigzag stitch sew along all the edges to prevent fraying. If you have a serger, use that. I didn't and the close zigzag seems to work. This will take some time but it's repetitive. 

Step 6: Fold all the edges over half a inch and sew along using a 1/4 seam allowance except for one of the long ends! I left the top of each ruffle just zigzagged which gave it a more rustic look and also made the ruffle look nicer.

Step 7: Ruffle time! Set your machine to the widest straight stitch and the loosest tension. Leaving a very long tail of both bobbin and sewing thread, sew a line 1/3 of the way down your strip. Leave a long end tail of sewing and bobbin threads!

Step 8: Sew another line directly under the first about 1/4 an inch down. Leave long starting and ending tails again.

Step 9: Pulling one start thread, begin pulling and you will see your strip start to bunch up. Pull gently or your thread may break. If it breaks, use the other thread and if that one breaks, use the threads from the other line.


Step 10: When your strip is the same width as that of the runner, sew a zigzag stitch over the bunched threads. (MAKE SURE YOU CHANGE YOUR TENSION BACK TOO!) This will lock your ruffle in place!

Step 11: Repeat steps 7-10 for the remaining strips.

Step 12: Play with the placement of the ruffles. I wanted the top of the first ruffle to hit at the edge of the table. Pin the ruffles in place and sew on using a zigzag or straight stitch. 

One ruffle down!
Step 13: Enjoy your runner :)