I would like to consider myself to be a fairly active person and for awhile I dismissed the idea of investing in a daily tracker. A few years ago, the idea of a Fitbit started to grow on me but I held off because I didn't like how large the Charge was but I didn't like how the smaller version, the Flex, wouldn't display time or steps on it. So I patiently waited until Fitbit released the Alta this spring. It's slim like the Flex but it will show the time, steps, calories burned, active minutes, and battery life among other things. I wish it had heart rate like the new Charge but I am pretty content with this investment. 

I went back and forth once the Alta was released because I am a pretty conservative spender. I considered using my graduation money, asking for one for my birthday in July, or waiting until Black Friday for a good deal. I decided it would be worth asking for it for my birthday and thus not getting it on sale as it would be used literally every single day. I changed my mind when I realized I could buy it for myself now (using graduation money) and still save a good chunk of change. Read on to see how I saved $40 on my new Fitbit. 

The Alta retails at $129.95 across the board no matter where you look (Fitbit site, Amazon, Walmart, Target, etc.) and then you need to consider sales tax. In Indiana, I had an extra $9.10 in sales tax, bringing my grand total to $139.05. Through shopkick and Ibotta, I only ended up paying $99.05. I have had the shopkick app on my phone for awhile but hadn't tried out Ibotta until a few weeks ago. I had seen Ibotta adds on Pinterest but didn't try it out until reading this post on Carter's aunt's blog. 

I saved $40 with a $10 Best Buy gift card earned from redeeming shopkick kicks, a $20 Best Buy gift card from Ibotta, and a $10 back for $100 spent at Best Buy from Ibotta. I explained how I earned these cards below:

Shopkick and Ibotta are both apps where you can earn money through your shopping.

Shopkick
You don't have to buy anything to earn rewards through shopkick, you just need to have the free app opened when you walk in the store. You can earn kicks (points) for free through walking into eligible stores and earn more kicks by scanning select items. You are able to get more kicks through certain stores that will do x amount of kicks per dollars spent (i.e. 2 kicks per $1 spent.) You can also get a lot of kicks if you buy eligible items and upload an image of your receipt.

Once you have earned enough kicks, you can trade your kicks for gift cards to a bunch of different places such as Starbucks, Amazon, Best Buy, or Target. You can get gift cards in different amounts such as $2, 5, 10, 25, or more depending on the store.

If you are interested in trying out shopkick, use THIS LINK (You will get some bonus points and I will too; one step closer to some free money!)

Ibotta
Ibotta is more of an instate rebate program. You have to spend money in order to get money back with this app. You sort through the free app by category and unlock rebates that you are interested in. Then you go and buy those items and take a picture of the receipt (some items need to have the barcode scanned too) and they will give your money back as a credit in the app. Certain stores will also give you money back if you spend enough. For example, Joann's will do a deal where you get $5 back on purchase of $35 or more and Best Buy did a deal for $10 back from every $100 spent.

Once you have enough in Ibotta credit, you can withdraw this money to your PayPal or Venmo account or trade it in for gift cards.

If you are interested in trying out Ibotta, use THIS LINK or this referral code: kuyurmp (You will get a $10 bonus after redeeming your first rebate and I will get $5)

I am a huge fan of smoothies in the morning. In the past, I was limited to having smoothies on mornings when I wasn't in class because A) making smoothies is noisy and I didn't want to be using a blender super early in the morning and B) making a smoothie takes longer than pouring a bowl of cereal. This all changed when I saw this article on Buzzfeed about making a week's worth of smoothies all at once. Basically, you blend up a bunch of smoothies, pour them into glass (or other freezer safe) jars, freeze them, and then put one in the fridge the night before you want it. Come morning, the fridge has softened the frozen smoothie back to smoothie consistency. 

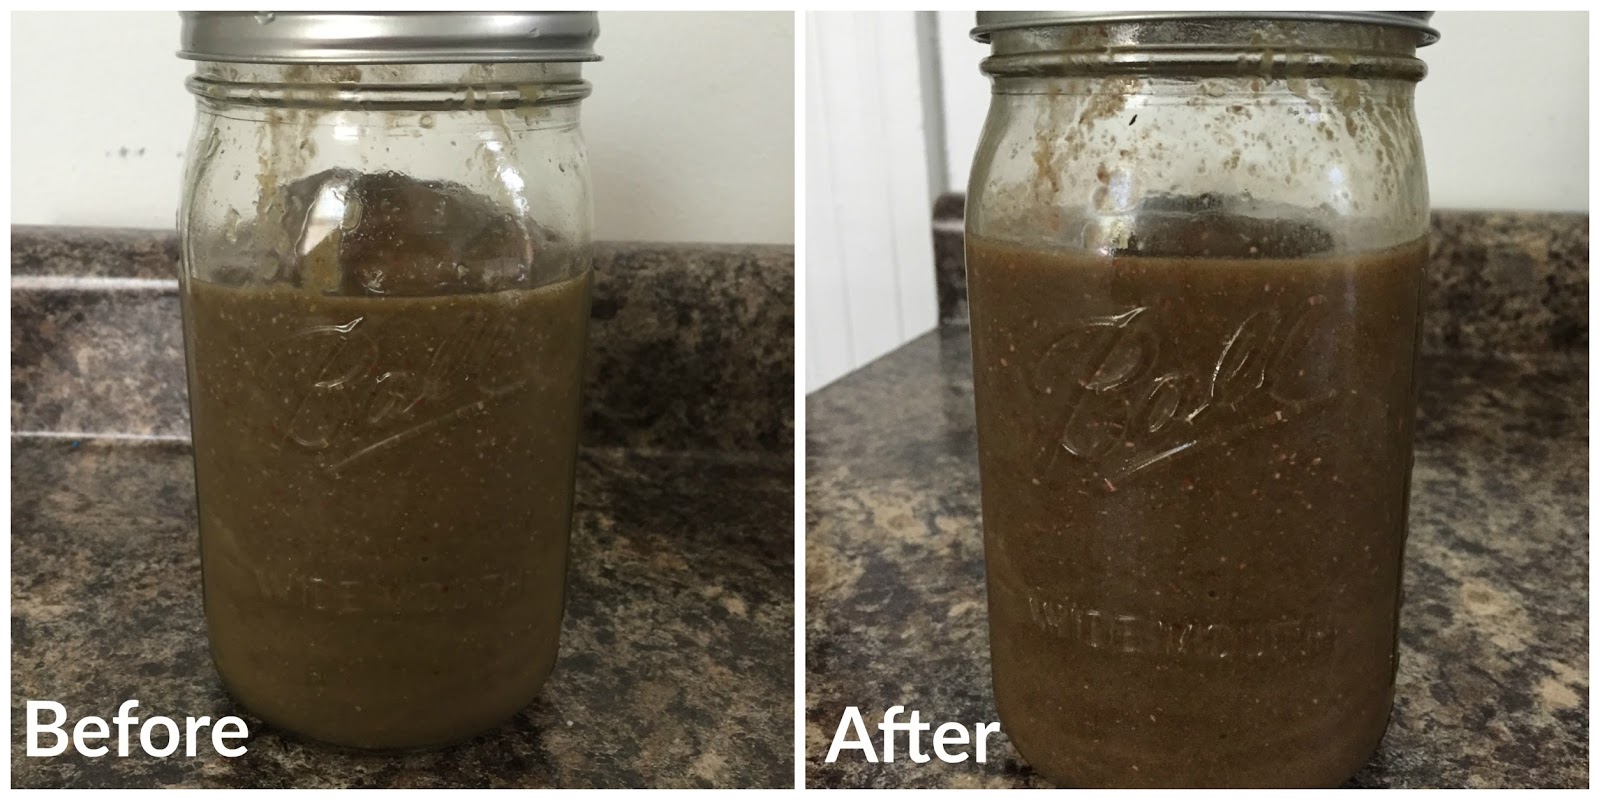
I was skeptical. I wasn't sure how these would freeze and then thaw. I was also a little worried that come morning the smoothie would still be too frozen or too melted. So I tested it one night making a single smoothie. Results? It works! I am sold. As you can see below, the smoothie looks the same before and after. 


When I make my smoothies, I just wing it. I have seen lots of tasty looking smoothie recipes on Pinterest but I haven't taken the time to follow a recipe because that usually requires going out and buying extra stuff. I usually use strawberries, a banana depending on my base liquid, spinach, and chia seeds. My base liquid is usually almost always orange juice or green tea. Sometimes coconut or almond milk. I don't like yogurt so never yogurt. Gross. 

What's in this particular smoothie you ask?
- 1 banana frozen and cut into slices
- 1-1.5 cups frozen strawberries
- 1/2 cup frozen shredded spinach
- 1/2 teaspoon lemon juice
- 1 package stevia
- 2 tablespoon chia seeds
- 1-1.5 cups orange juice

I blend my juice, chia seeds, lemon juice, and stevia first. Then add spinach. Next the banana. And end with strawberries. 

I am planning to try making the week's worth of smoothies this summer for breakfast on the go to work.
I have something to admit. I am a bit of a leather snob. When it comes to what's on my feet or what I am carrying on my shoulder, I won't buy it unless it's leather. No man-made materials for me. Sure a man-made vegan leather might not scratch as easily as an animal's hide but you are also losing the classic, real-leather feel. I love that feel. Cleaning up stains on fake leather is also a much easier process but I am willing to put in a little extra time to cleaning up spots for my real leather goods.

Real leather isn't cheap which is why when I am investing in a product, I try to make sure that I will be able to take proper care of it and do my best to make it last a little longer and look a little better. Leather naturally softens and scratches with age and that's fine but I don't want to have stains all over my stuff. This can be tricky when looking for leather goods secondhand. As you may should know, I am all about a good bargain and do the majority of my shopping secondhand. I am going to share a little secret on a place where I will go to look for clothes, shoes, and accessories from time to time.

ShopGoodwill is Goodwill's free, online, auction site. They have everything from home decor, clothes, shoes, jewelry, and furniture up for sale on this site. It can be a little tricky to dig through because you cannot filter your original search like you can on other auction sites like eBay. So you do have to do a little digging through various sizes, prices, and the like but you can get some really good deals on here. If you haven't checked it out already, I encourage you do so! Tip: click the shipping and handling estimate before you bid. Sometimes their shipping and handling prices are a bit high and it's good to know that before you win an auction. Like eBay, there is proxy bidding; you can put a maximum bid in but it won't go up to that amount until someone else bids it up that high. You can read more about bidding here.
So anyways, I won this Dooney & Bourke Florentine Bag for less than a third of its retail price. It's still a current product! I love the three pockets and my small Fossil cross body that I got in high school started to tear. I wanted another small bag that is good for going out or on days that I don't need to carry around much. This bag was an ideal choice. It is in stellar condition for a used bag besides a two super small stains on the front. There inside is spotless which was an added bonus.

What you'll need:
- Bar of Dove Soap
- Microfiber cloth

Directions:
-Dampen cloth and rub with soap
-Gently rub the purse with the cloth. Your purse will look worse at this point because it's wet. 
- Let dry and assess how the bag looks. At this point for me, some of the polish had been removed when I washed it but the stain was gone. 

- Apply a leather oil to the spot. After doing this, the spot that was stained and then lighter was now the same color as the rest of the bag.


Source: Ask Anna


I am a college student. I am graduating at the end of the month and then I am going on to grad school (more on that in a future post.) Renting and having moved into a different place every year leaves very little desire to try and buy/make pieces customized to the space where I am at nor do I want to invest in any high dollar items. Today I want to share some of my favorite tips for decorating on a budget.

Check Craigslist out
I got this IKEA Alvine Ruta rug for $75 on Craigslist and it has held up wonderfully. I need to wash it but that won't be any time soon. My used price is much better than the brand new price of $249. I like the pattern and the fact that the rug is 100% wool.

Check your apartment building's trash area
Whenever a neighbor moves in or out of their unit, there is a good chance they will be tossing something. Carter snatched up a fan which he was excited about and I got this rug. Completely FREE!


Garage Sales
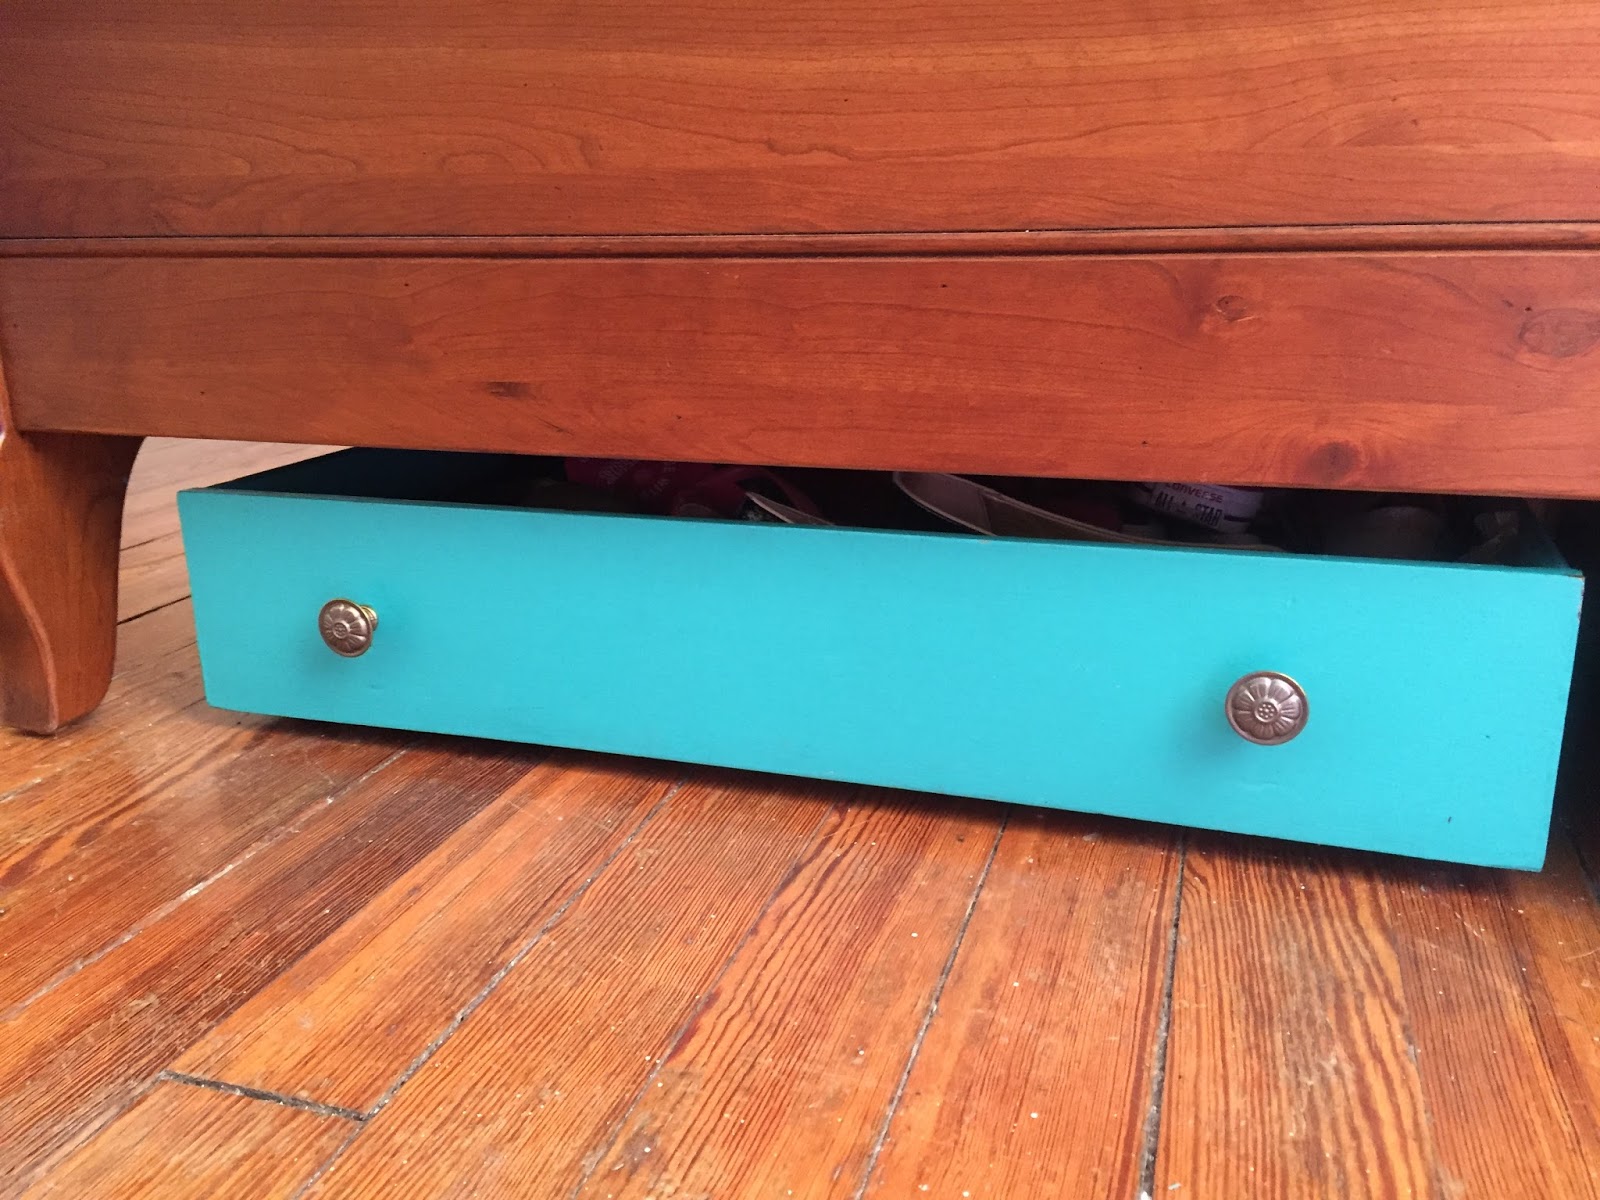
I made these underbed storage drawers using garage sale drawers. I paid 40 cents per drawer.
DIY underbed storage
I also bought my printer with scanner and copier at a garage sale for $10.00. The couple was mailed a new one from HP after this one "stopped working" after they returned from their winter home in Florida but I have had zero problems.


Check out your local thrift shops
I have found some pretty awesome little knick knacks. I love my two metal tins. The smaller holds matches, gum, and laundry coins while the larger holds headbands and hair accessories. I have also bought a lot of other great things secondhand. 


See what your family is not longer using and planning on tossing
I have gotten a lot of things this way. A dining table from my grandparents, a few carts, and my favorite: my beloved ceramic owls. All free!


See what you can borrow from family
Chances are if someone will let you borrow something because it also means they don't need to deal with storing it. I have been able to use Carter's mom's childhood desk from her parent's home. It's an adorable midcentury piece that is the perfect size for my space. It has two awesome little drawer spaces - one where I can hold my books and another for my pens. Again this is free!


Ask for things you need for your birthday/Christmas
My dresser was a gift that was actually purchased on Craigslist but I love the antique style.


See what you can DIY
Maybe some thumbacks or magnets?


I have referenced this post on how to recycle yarn from old sweaters a lot. I reference it a lot for a few reasons including that it's an incredibly cost effective means for getting yarn, I like to recycle/reuse, and I go thrifting a decent amount (but less than I used to.)

On Valentine's Day, Carter and I went to one of our favorite Goodwills on the hunt for a cast iron skillet to cook our dinner's filet mignons and since we were already there, we looked around a little. It was a good day for me in terms of what I found, including this large, lambswool, GAP, fair isle sweater (note that I just used four adjectives to describe the sweater.):

So many colors!
After dinner and during the midseason premier of The Walking Dead, I got to work on dismantling the sweater. I rolled each color into different little balls. There are sixteen different colors going on in this sweater. This means lots of fun scrap yarn to make something colorful!

One thing about wool fiber is that it felts. This is a bad thing if you accidentally toss a cashmere/wool sweater in the dryer but it's a good thing if you are recycling yarn. If you want to take the time, you can eliminate joining ends together with knots and thus weaving in ends by felting the ends of strands together. You can do this with non-recyled yarn too as a technique for adding on another skein, you just need to make sure at least half of it is wool. This doesn't take too long either. You will spend under 30 seconds going two ends of yarn together through felting. Keep reading for the how to below...

What you'll need:
- Yarn 
- Warm water
- Dish Soap

How it's done:
- Dismantle your sweater using this tutorial

- If your yarn is plied, separate about an inch of the yarn ends into individual strands

This is a 3 ply yarn!

- Overlap the ends of each piece a little bit, around 2 inches


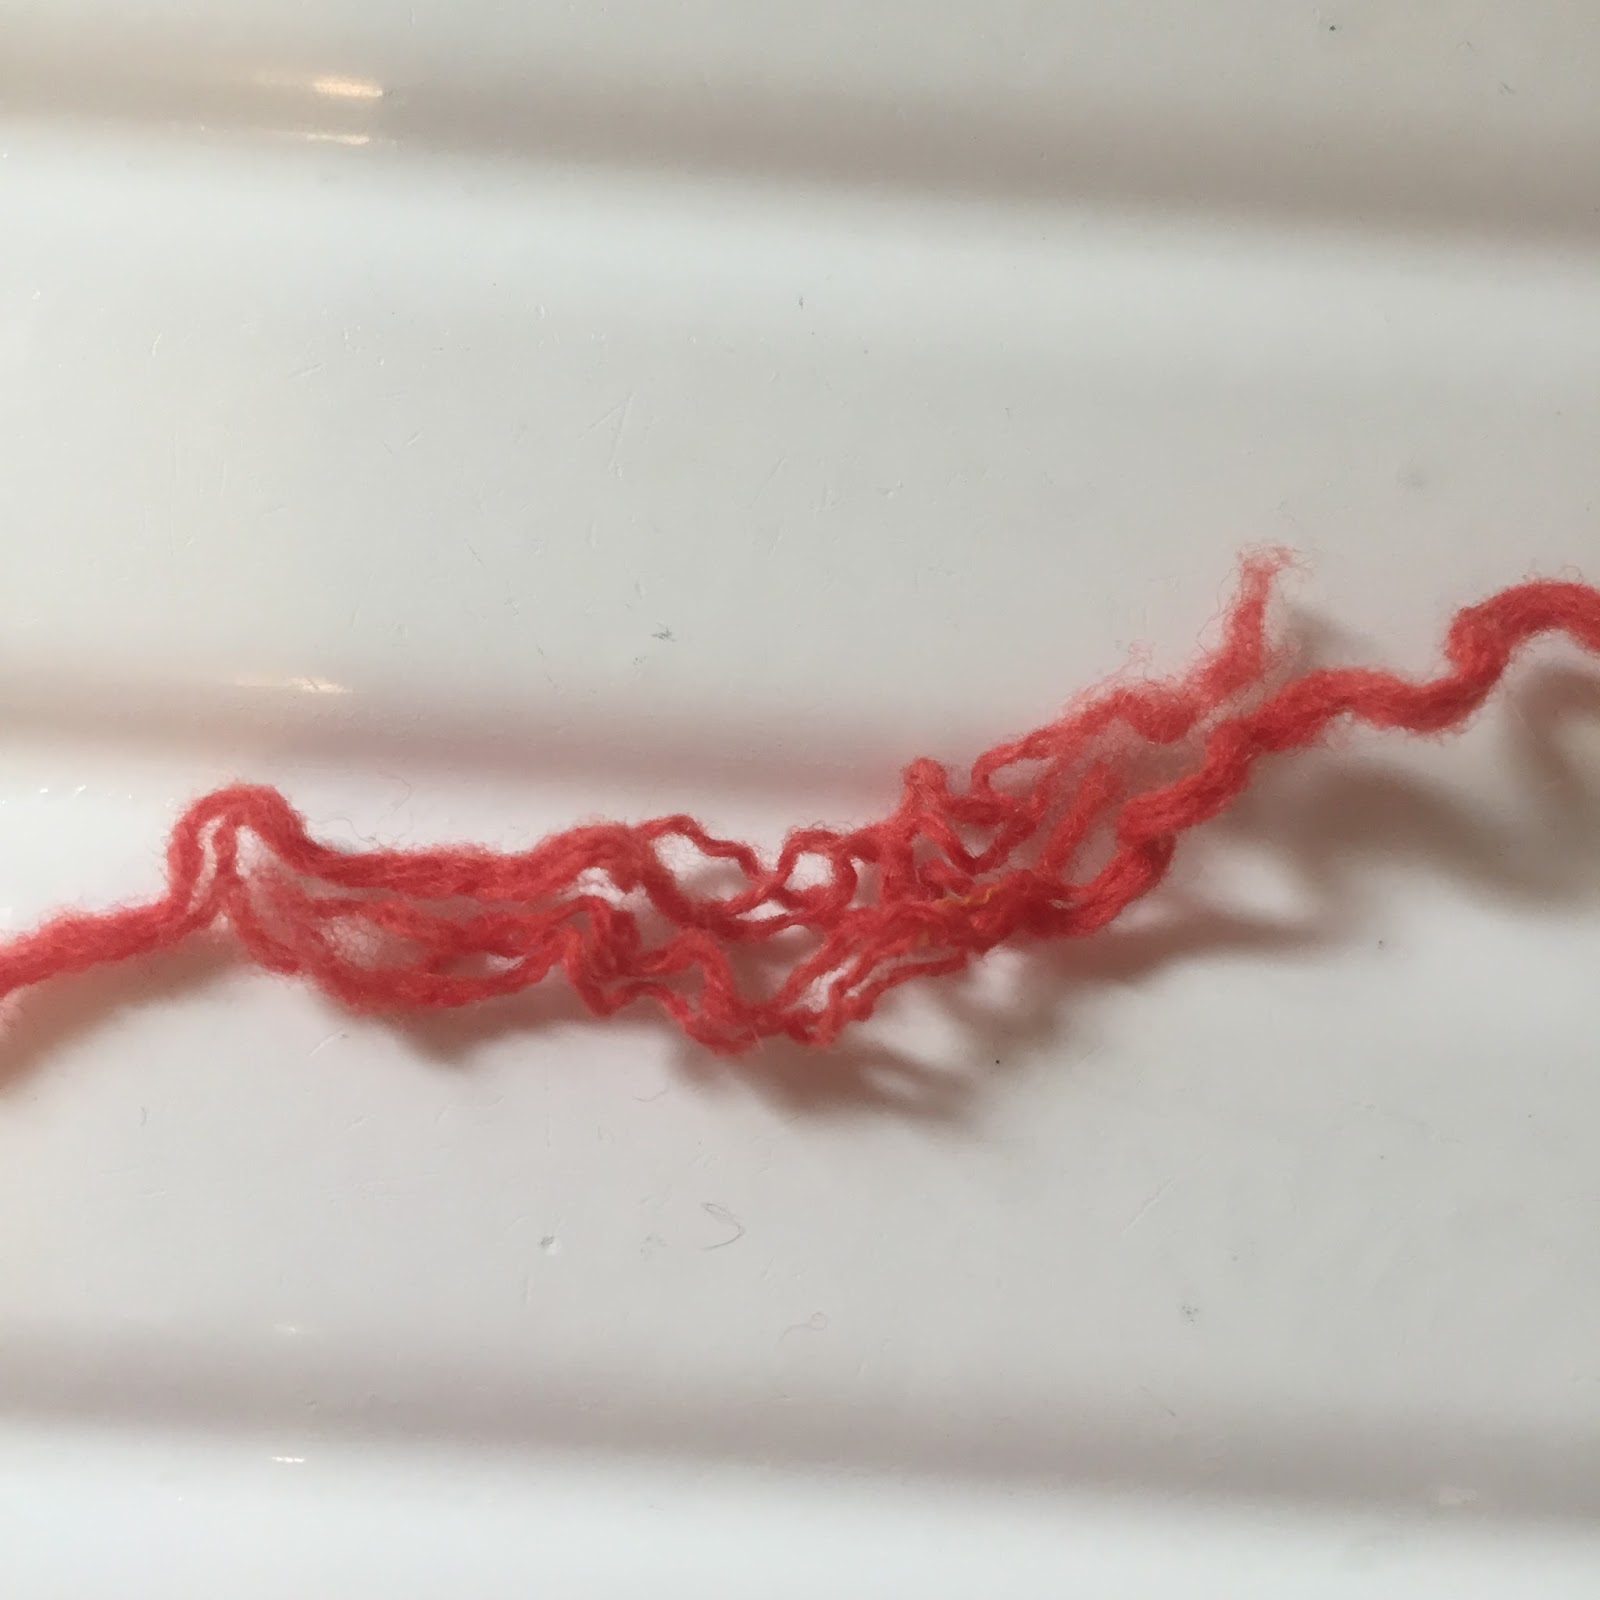
- Taking ends you want to join together, run both ends under warm water*


- Rub your palms together with the the yarn ends between them
- If you are having problems getting the yarn to fuse, use a little more warm water and add some dish soap. The soap helps add a little more friction

These two pieces are now joined.

- I like to give a little test tug on the join. If the pieces pull apart, I restart the process. It's a pain to redo a piece but it didn't happen too often. Of all the joins I made from the 16 colors featured in the fair isle sweater, I only had to go back to the sink for one join that pulled apart as I was winding these into hanks. I would have been doing it a lot more if I hadn't tested the joins.

A little test tug. 

This took some time because all all the individual pieces in the fair isle sweater but in general for joining yarn ends together for regular skeins, this is not a lot of work!

*IMPORTANT: Don't get all of the yarn wet, just THE ENDS OF THE YARN should be. 


If you knit or crochet you know that buying nice yarn is expensive. There is a way that you can get nice yarn  though if you are willing to do a little bit of work. And it's a green project too!


You can deconstruct sweaters for yarn and save some money! Here's a few tips for doing this:

1. Avoid Cotton, most cotton sweaters are made from tons of individual threads versus just a single piece of yarn. There's a way to check if its a single piece of yarn or many threads and its really easy.
Just pull a stitch and see if its one strand or many. When you're done, if you pull around where you picked the stitch, it will go flat and you won't be able to tell you pulled it.
Many strands:

One strand:

2. If you are getting any wool/natural fiber sweater, make sure the piece isn't felted. You can also check to see if it is felted by following the method used in #1 to see if there many threads or just one. If it's felted, the yarn fibers are locked together and won't be able to be separated.

3. Save the labels for the yarn so that way you what the yarn is made of and how to care for the whatever you make using the yarn. Save the buttons for future projects!

How to make yarn:


HOW TO:

1. Remove any labels and buttons from the sweater. If you are using a cardigan or a sweater with buttons, use a seam ripper to removed the threads sewn around the buttons holes.

2. Start to take apart the sweater but ripping its seams. If you cut the seam at the top. it should unravel all the way down fairly easily. If you cut the seam at the bottom, you should have to unravel the seam yourself. 

3. Pull apart the sweater.


A giant mass of yarn

4. Wind into a ball. 


It may be hard to tell, but you can get a crazy huge amount of yarn by taking apart a sweater. If you have ever knit a sweater than you know how much yarn one sweater takes. The purple were from this deconstructed vest which was a size small but the cream was a from a large sweater and you can sort of tell that there is more there. PS for reference, the cream ball is the size of my HEAD!
Good Luck and enjoy!


Felting sweaters is a really easy project to do. It will take a few hours but all you need to do is start your washing machine and then transfers the sweaters into your dryer. I gathered a hoard of wool sweaters at local Salvation Army stores and I wanted to try out washing machine felting.

In order to felt, the wool needs to be agitated so that the fibers can blend together. This can easily be accomplished in your washer and dryer with hot water and heat.


What you need:
-washing machine
-dryer
-soap/laundry detergent
-wool sweaters (the sweaters MUST have a high wool content-at least 50% but mine were 100% wool)

1. Gather your sweaters. This is the fun part, you can find them at thrift shops, garage sales, or even your closet.
2. Wash your sweaters on a setting that has a hot water wash and a cold rinse cycle. Add your soap or laundry detergent. You can add towels or other articles of clothing for extra agitation. (I threw in some old rag towels.)


3. Dry the sweaters on the warmest heat cycle on your dryer.


4. Check out your wool. See how it has shrunk and looks a little bit warped? It should also feel thicker and stiffer.

This was originally a large box shaped sweater.

                                           This blue one shrunk so much!


5. If you aren't satisfied with how some of your sweaters felted, you can repeat the process until you are. If your sweaters are a lower wool content, this could take multiple times which is why I went with 100% wool sweaters but I still need to refelt a few.

Originally I started with 15 sweaters. I didn't felt the two really nice Woolrich sweater (the past owner took awesome care of them!) Nor did I felt this awesome and BRAND NEW Ralph Lauren men's knit sweater. It was hard enough to felt the other sweaters, even the ones with snags and holes. I also gave two sweater vests to my boyfriend Carter's dad who likes them for work. I plan on making a big blanket or two from the sweaters when I am home from school at some break. It will be interesting to see how many squares each sweater will yield!

Happy Crafting!
A few years ago t-shirt yarn became really popular. It's a great recycling project and it is super easy to do. I started making t-shirt yarn when I cleaned out my dresser and had so many shirts that I hardly ever wore. Instead of donating them, I began to make yarn.

I highly recommend getting old shirts from thrift shops. They usually cost 25-75 cents and you can get them even cheaper on half off days! If you are thrifting for t-shirts, always, always, ALWAYS go for the large, extra large, or tall fit shirts. Why you ask? MORE FABRIC FOR YOUR MONEY. But if you are sticking to a color theme for your project or see a super awesome color shirt but it's a smaller size, go for it anyways, you'll still get a ton of yarn from it.

To get started what you need:
Steps:
1. Start by washing your shirts if they were thrifted.
2. Cut the band around the bottom of the shirt off. I just follow the top stitching around.


3. Starting at one of the corners, cut a strip about one inch thick across the body of the shirt, once you get to the end, flip the shirt over and continue to cut. (cutting t-shirts is sorta like using one of those apple peelers that take the peel off in one piece.)


4. Keep cutting until you reach the armpits of the shirt (once you can no longer make continuous strips.

5. Starting at one end pull the string so that it stretches out and curls.


6. Repeat step 5 until the entire string has been stretched out.
7. Wind into a ball and enjoy!

What I like is that this is a mindless project, I can work on this while watching movies and I also love that it't not important for the thickness of the string to be exact.

Happy crafting! :)